Awesome Screenshot: Capture and Annotate for Google Chrome and Safari

Here is a review of the Awesome Screenshot extension for your browser.
And the winner of the most self-explanatory and most accurately self-reviewed Google Chrome Extension title goes to: Awesome Screenshot: Capture and Annotate. This lightweight little Google Chrome extension (also available for Safari and coming soon to Firefox) does and is everything that it says. It lets you take screenshots of webpages by capturing the visible part of the page, a selected area, or the entire page. After that, you can crop it, mark it up and annotate it. And, as mentioned in the name, it’s awesome. The only thing the extension’s name doesn’t cover is it’s equally as awesome sharing capabilities, which are highly befitting of an app developed by the folks at Diigo. Overall, it’s like a lite version of Snagit, but for web pages only, and with an easy as pie social element and no registration-required image hosting.
Awesome Screenshot: Capture and Annotate is free and takes seconds to install, so you may as well give it a whirl yourself if you’re interested. But, if you simply must know more about this extension before giving it a download, read on to see it in action.
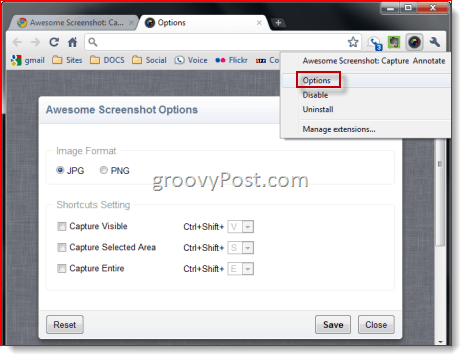
After you install Awesome Screenshot: Capture and Annotate, it sets up shop in the upper-right hand corner with the rest of your extensions. There’s no real setup required, but if you’d like to change the file format (JPG or PNG) and choose keyboard shortcuts, you can right-click the icon and choose Options…
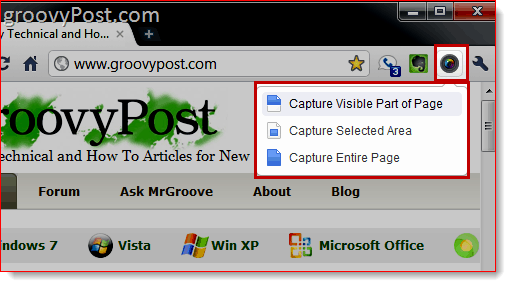
When you’re ready to take a screenshot, simply click the Awesome Screenshot: Capture and Annotate icon and choose an option from the menu:
- Capture Visible Part of Page – Takes a screenshot of what appears inside the current browser window.
- Capture Selected Area – Takes a screenshot of a selected area within the visible window.
- Capture Entire Page – Captures entire vertical and horizontal scrolling area of the page.
For Capture Selected Area, you’ll be given a crosshair so you can draw a box around the area you’d like to select. Do so and Click Capture to capture the highlighted area or Click Cancel to re-select. The other two options happen instantly.

Capture Entire Page is perhaps the most exciting feature with this extension—especially for those who don’t have an app (like Snagit) that features scrolling captures. For anyone who has struggled to manually stitch together multiple screenshots to get a “full page view” screenshot or worse, tried to create a “printer-friendly” PDF of a webpage, the scrolling capture feature will certainly be welcome. Capture Entire Page grabs the entire webpage in all its glory. Check out this screen grab of the groovyPost homepage to see for yourself. These full-page screen grabs are perfect for clip portfolios.
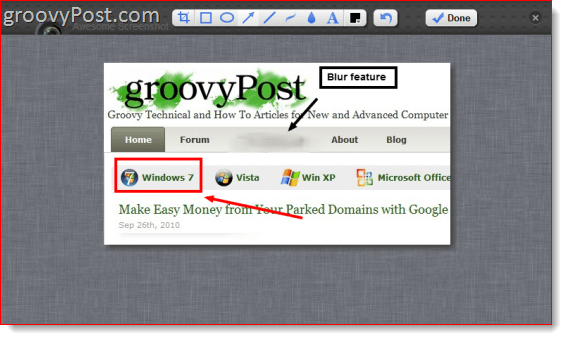
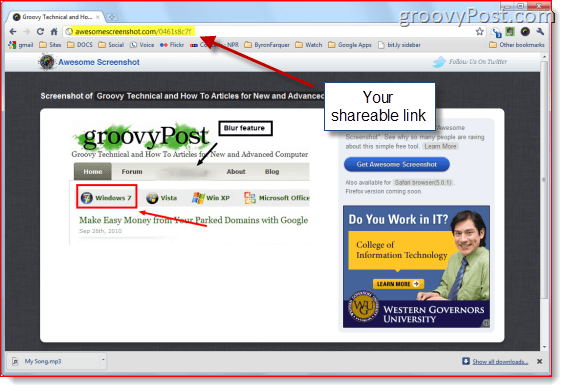
Next, you’ll be brought to the rudimentary, yet sufficient, editing screen that lives right inside of your browser. Along the top, you’ll have the following tools: Crop, Box, Circle, Arrow, Straight Line, Freehand, Blur, and Text. You can also choose different colors for each tool and undo your last action. The blur feature is particularly handy, as it lets you blot out sensitive information, such as login credentials, account numbers and email addresses. When you’re satisfied with your scribbles, Click Done.
Now, you’ll have two options: Right-click your image and choose Save as… to download your screenshot and save it locally, just like any other image pulled from the web. Or, you can upload it to Awesomescreenshot.com, where they’ll host it for you and give you a shareable link.
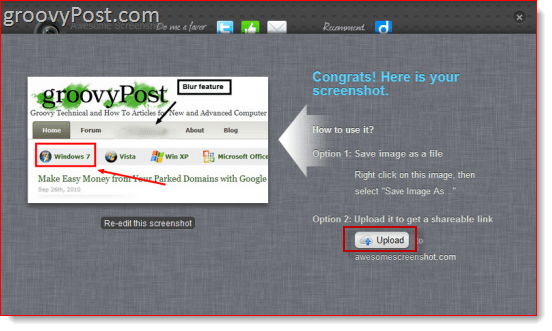
The link will look something like Awesomescreenshot.com/0461s8c7f, which is nice and unique, so no one can go guessing your URL. As far as I know, the image is hosted indefinitely—the only catch is that Awesomescreenshot.com gets to accompany your image with a plug and an ad.
If you were so inclined, you could even hotlink the image for your blog or website. Awesomescreenshot.com stores their files using Amazon S3, so your images will be hosted fairly reliably. Of course, there’s nothing more surefire than hosting your own images, but the option is there if you’re interested.
The only known limitation of Awesome Screenshot: Capture and Annotate is its inability to capture flash elements. Also, although Google Chrome warns you that the extension will have access to “Your data on websites” and “Your browsing history,” the extension doesn’t actually use this info. And according to the developers, “It does not access your private data. Chrome shows the warning for all extensions that access browser tabs even if they do not access any private data.”
Conclusion
Overall, I think Awesome Screenshot: Capture and Annotate is an excellent free tool. However, I can’t think of many situations where I’d use this instead of Snagit, which can also capture entire web pages, including horizontal and vertical scrolling areas, video and on and on… But I can see web designers and developers using this extension to quickly share notes and thoughts with clients and colleagues. And although Windows 7 already has the Snipping Tool and OS X has an admirable screenshot tool, I can’t think of any application that allows you to capture, annotate and share in as few steps as Awesome Screenshot: Capture and Annotate. Possibly Jing but, I would argue Awesome Screenshot is just that, Awesome!
Lorine
February 9, 2012 at 12:31 pm
Can you tell me is an icon either for your desktop or taskbar available for this program. the problem I have is that if I want to take a picture of something that is not on chrome’s page I can’t. So I figured if there was an icon I could use it on any page.
thanks
Candi
February 17, 2012 at 10:03 pm
I have this on my Mac, but when I click on capture selected area, I don’t get the crosshair you are talking about. I’m wanting to be able to scroll while selecting. Does this program allow that? I haven’t been able to tell since the crosshair never shows up for me. Am I doing something wrong? Thanks for any advice you can offer.